Tag Archives: autoimmune protocol

cauliflower rice and grilled chicken – aip and paleo

Before starting the AIP diet, I used to be a big fan of rice. I used to eat it both as side dish as well as main course, in paella. But since rice is not allowed in the Elimination Phase of AIP, I had to find a replacing option. And this is how I discovered the “cauliflower rice”.

It may sound like a trick, and it actually is a food trick meant to convince my brain that I’m not actually eating cauliflower – but rice. Anyway, I liked it so much that I decided to add it as a regular side dish in many of my lunches and dinners.

Here’s how I prepared the “cauliflower rice” with turmeric!

The ingredients I used for two servings are:

  • 1 medium cauliflower
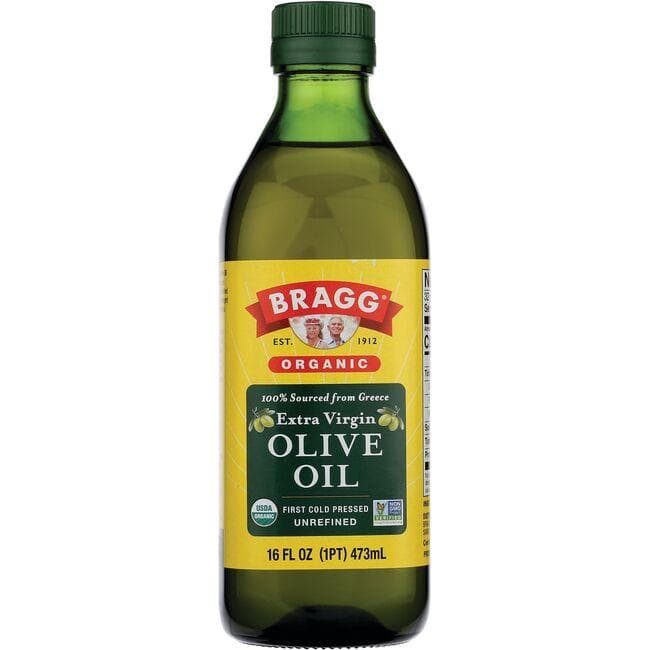
  • 1 Tbsp olive oil – I use this olive oil from Bragg – extra virgin:
  • 4 garlic cloves
  • 1 leek
  • 1 white onion
  • 3 Tbsp water
  • 2 tsp turmeric
  • 1 pinch salt

And here’s how I prepared it:

  1. I minced the onion, leek and garlic into small cubes.
  2. I used a larger pan and cooked the leek, garlic and onion in the olive oil for 2 minutes on medium heat, until the onion turned glossy. I then added in the water over them and let them sit for 2 minutes.
  3. Meanwhile, I washed the cauliflower, cut it into smaller chunks to make it easier for the blender to mince it, and then I blended it on medium power until it got a rice consistency.
  4. I put the rice-like minced cauliflower into the pan besides the other ingredients and added in the salt. I mixed everything well and I put a cover over the pan. I let everything cook on medium heat until the cauliflower softened and I mixed from time to time.
  5. When the cauliflower softened, I added in the turmeric and mixed everything well. I left it for another 3 minutes on medium heat and then I removed it.
I served the cauliflower rice with grilled chicken breast that I cut into smaller pieces, sprinkled with a bit of olive oil, thyme and salt and grilled for 3-4 minutes on each side.

This specific dish helped me remember the consistency of rice after two whole months of AIP strict diet. 🙂

Enjoy and let me know your feedback in the comments section!

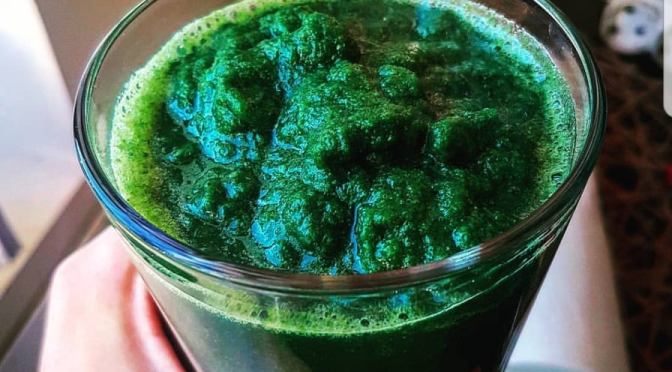
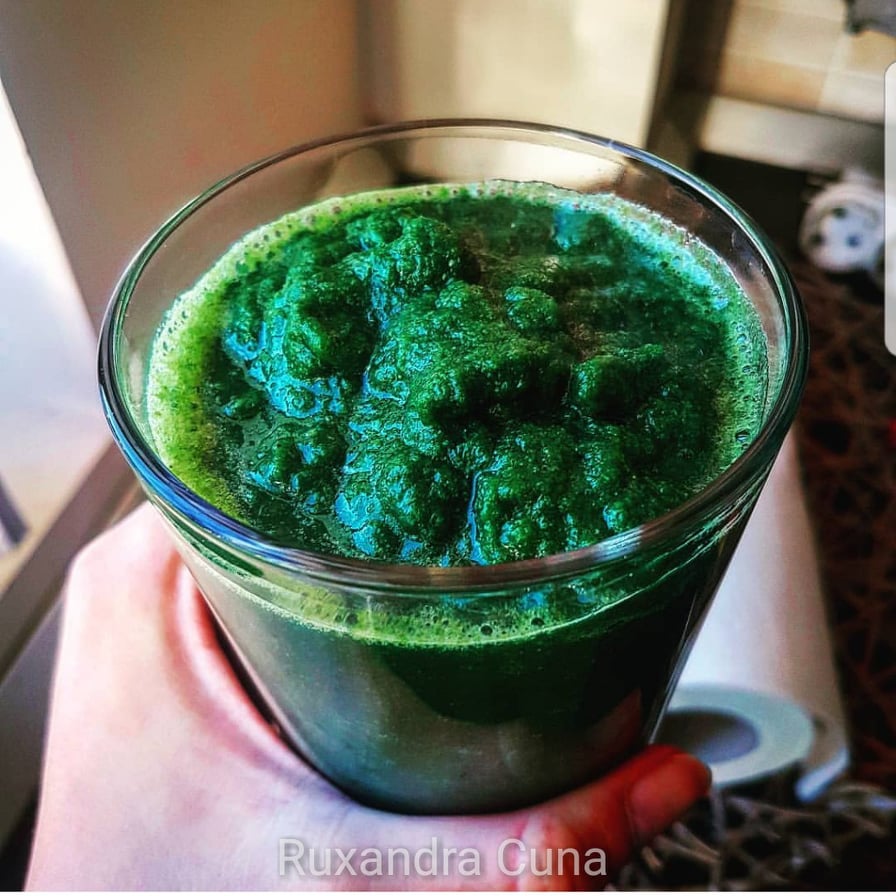
How Spirulina Triggered my Graves Disease

53484775_253166645564745_6243754336568999936_n

After I started the AIP diet I became obsessed with explaining myself everything. Maybe because I started this healing journey that treats the root of the disease rather than the effect, so I guess this inspired me a lot in finding what made me sick in the first place.

Until 2018, my biggest health concern had been the fear of getting cancer. This was the absolute worst disease in my mind, a disease I was so afraid of. This fear was probably caused by the fact that the cruel cancer had occurred in my family, I saw it manifesting and was well aware of the grief it could cause. Whenever I heard of cancer I would remain speechless with terror.

But in my case, one fear led to another, which this time was 100% real, as in 2018 I got diagnosed with Graves disease. So my health priorities changed from obsessive cancer prevention to coping with a real autoimmune thyroid disease. I had never been seriously ill before getting the Graves diagnosis, I had only been obsessed with preventing diseases that were just in my head, not inside my body.

Now, let’s start with the beginning, with the life choices I made that triggered my autoimmune symptoms.

Unlike other Graves disease patients, I am 100% sure what triggered my disease. It was the huge amounts of spirulina I used to consume. I found out about it only after I got diagnosed with Graves, and started to look for my triggers in an obsessive way.

So knowing this for sure, with the help of my doctors who confirmed it, after I got my Graves diagnosis I even encouraged myself into thinking: “if I know what caused Graves in me and if maybe I caused it myself – the way I know it – I will certainly find a way out of it!

Before I got Graves, I used to be obsessed with staying healthy, especially given my previous fear of cancer. Used to be obsessed with keeping my immunity high and used to do all kinds of researches for it. All these studies and researches got me into buying and consuming all kinds of food supplements, some more organic than others. I used to consume A LOT of spirulina, maca powder and pollen – besides all the raw greenies I used to be crazy about. One might consider this as a pretty healthy choice, eating all organic and adding supplements to almost all the foods I prepared.

But I jumped the line.

I made two mistakes:

  1. I kind of auto-medicated myself, which I now understand is a very reckless thing to do, not having real sense of quantities or recommended combinations of supplements. I used to just add handfuls of supplements to my smoothies daily and would expect the best of my health out of doing this.
  2. I hadn’t had any blood tests done before taking supplements, so I ended up getting too much of a specific nutrient in my blood, which eventually made me sick.

And I did all of this out of a stupid fear for getting cancer.

Since I hadn’t had any blood tests done before taking the supplements, it was only after I got diagnosed with Graves disease that I started to review every action I’d done in a reversed order, to figure out what I’d done wrong. So by reviewing about everything I ate the year before, with support from two physicians who helped me reach a conclusion, I finally figured it out: the supplement that triggered my autoimmunity and that blew up my antibodies was SPIRULINA.

Here are the factors that lay at the basis of my theory:

  • I ate industrial quantities of spirulina 2 months before I got diagnosed with Graves disease. All my smoothies, shakes and desserts used to contain at least 2 tsp of this supplement, that I was seeing as the no. 1 cancer-prevention at that time.
  • Spirulina contains very high values of iodine, which in my case triggered the thyroid reactions and caused me some symptoms that were incredibly new and disturbing (extreme fatigue, headaches and muscle cramps all over my body).
  • I also consumed spirulina a couple of times after I got diagnosed with Graves, to figure out if it was really a trigger, and every time I did it, the symptoms would become worse than those of any other foods I’d eat.

So instead of acting like a superfood, in my case Spirulina brought out all its iodine into play and triggered my antibodies, making my autoimmunity speed up so much.

My advice for you would be to act very careful on what supplements you are taking and always try get an opinion from a functional doctor or at least a nutritionist.

I hope my experience with spirulina will help all the hyperthyroid and Graves patients out there!

AIP – 30 Day Reset Phase – Allowed and Banned Foods

Before adopting the AIP diet for your autoimmune disease (Hashimoto’s, Graves, Lupus, Celiac or others), you may wonder what this diet can do for you and your symptoms. In this article I’m going to explain the role of the diet and the allowed foods list in the simplest words and by real examples.

Ruxandra Cuna

First things first, what is the AIP diet?

The Autoimmune Paleo diet starts from the idea that most autoimmune diseases are caused by a leaky gut syndrome. In simple words, this can be explained as below.

By triggers like eating unhealthy foods, by stress and excesses, our gut is attacked by inflammations that create small holes in the membrane of the intestine and get toxins spread out into our immune system. This way, our immune system reacts to these toxins and starts attacking organs in our body, like in the examples below:

  • it attacks thyroid in Hashimoto’s or Graves Disease
  • it attacks small intestine in Celiac disease
  • it attacks the immune system itself by Lupus

So the purpose of the AIP diet is to heal the inflammations, or holes in the gut and make it recover, to prevent these inflammations from leaking toxins into our immune system. But for this gut healing process to take place, the gut needs an initial recovery period, which is the 30 days (or even more) Reset Period, during which the AIP diet only allows anti-inflammatory foods. These specific foods are meant to heal the membrane of the gut and stop the autoimmune symptoms.

While it has ben proven that the AIP diet helps in most autoimmune conditions, there is also a slight possibility that it may not work in some cases, most likely because there are also other measures to take for healing autoimmune. These are a change of lifestyle with more rest, less stress and a gradual elimination of the triggers causing autoimmunity in general. But it’s definitely Worth trying, just considering that it’s such a healthy choice it can’t actually do harm to the body.


The AIP diet has two main phases:
  1. The 30 day Reset Phase-extended until up to 90 days if needed, or until symptoms improve considerably and antibody blood tests also back up the efficiency.
  2. The Re-introductions Phase – which follows right after the Reset Period and involves the gradual and careful re-introduction of the foods that have been banned in the 30-90 day Reset Phase.

Now let’s take the 1st phase separately, the Reset Phase, and see what we’re allowed to eat 🙂


The 30 days Reset Phase – Allowed and Banned Foods List

Like mentioned above, the 30 day Reset Phase may be extended to up to 90 days if the symptoms of your disease are not yet improved considerably, or if your antibody blood tests are not modified for the best.

I’ve been quite strict on my 30 days Reset Phase, making it 45 days Reset in my case, as I wanted to make sure I offer my gut enough time to heal by eating all organic and anti-inflammatory foods.

Here’s what you’re allowed to eat in the Reset Phase:

Meat (Grass fed or Organic)

PorkLamb
ChickenGoat
Offal (liver, heart, tongue, kidney)Duck
BeefGoose
RabbitFish-Seafood (moderate for Hyper)

Vegetables (Excluding Beans + Peas + Nightshades: tomatoes, eggplants, peppers, potatoes)

Sweet potatoSpinachBrussel SproutKale
BeetsBroccoliButternut SquashMushrooms
RadishRed OnionLettuceCarrots
ParsleyPumpkinSquashAvocado
Celery + rootParsnipOkraBok Choy
CauliflowerCabbageZucchiniLeeks
Acorn SquashCucumberSquashJicama
ArtichokeFennelTurnipsEndive
AsparagusGreen onionCassava

Healthy fats

Olive oil (for salads)Coconut oil (high temp cooking)
Avocado oilDuck fat
Pork lardBeef tallow

Fruit (maximum 2 servings per day, non-tropical fruit recommended)


ApplesPearsBerries
BananasCoconutPineapple
MangoPlumsMelon

Spices

BasilTurmenicChives
GarlicGingerDill
CilantroSaltRosemary

Flour

Coconut flourArrowroot powder
Cassava flourPlantain flour
Tiger-nut flourTapioca flour

Miscellaneous

Gelatin (grass fed)Tapioca pearls
Carob powderBaking powder (gluten-free)

Here’s what you’re not allowed to eat in the Reset Phase

Gluten and grains

WheatRiceQuinoa
CornAmaranthRye
BarleyMilletSorghum

Dairy (only banned in the Reset Phase)

MilkCheese
YoghurtGhee
ButterCream

Nightshades (only banned in the Reset Phase)

TomatoesEggplants
PotatoesPeppers
Red spicesGround cherries

Legumes (only banned in the Reset Phase)

BeansPeas
Soy beans Lentils

All nuts and seeds (only banned in the Reset Phase)

SunflowerPeanutsWalnuts
CoffeeCocoaPumpkin
HazelnutsAlmondsCashew

Miscellaneous (only banned in the Reset Phase)

Eggs
Alcohol

I will return shortly with the article on the 2nd phase of the diet, the re-introductions phase. Meanwhile, you can get inspiration from my daily recipes and start healing your autoimmunity. 🙂

The recipes I post on the blog are 100% AIP compliant, with special mention in case some ingredients may not be allowed in the Reset Phase, but are to be introduced in the Re-introductions phase. For example, if I use Eggs in a recipe, I will sure mention that Eggs are not allowed in the Reset Phase and suggest a replacing option for them, for example gelatin egg, which can be used in the Reset Phase.

Ruxandra Cuna

I hope the AIP foods list will help up at least as much as it helped me and I’m here to support you on your autoimmune healing journey with an open heart 🙂

You can refer to the comments section or to the AIP and Paleo Facebook page and group for any support in your autoimmune healing through AIP!

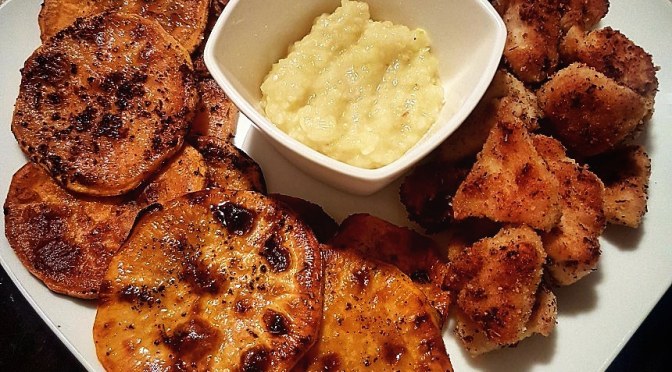
Chicken Nuggets with Sweet Potato Chips – AIP and Paleo


After all this time on the AIP Elimination diet, tonight I felt like tasting something different. Something fried. And I mean something that tastes like junk fried… And so, after thinking it through, I came up with an AIP option that’s much better than any junk food!

I found chicken nuggets and sweet potatoes fried in duck fat, all flavored with AIP garlic mayo… The chicken has coconut and garlic crust and the sweet potatoes I can only say it turned out YUM 😋

It’s a very simple AIP dish, here’s how I made it! ❤


The ingredients:

  1. 500 g (1 cup) chicken breast cut in smaller pieces (nuggets)
  2. 1/2 sweet potato
  3. 3 Tbsp coconut flour
  4. 1 Tbsp garlic powder
  5. 1 and 1/2 tsp himalayan salt
  6. 2 Tbsp ground thyme
  7. 5 Tbsp duck fat
  8. 8 cloves of garlic (for the mayo)
  9. 1 Tbsp olive oil (for the mayo)
  10. 1 or 2 Tbsp filtered water (for the mayo)

And here’s how I made the whole delish:

  1. I mixed the coconut flour, garlic powder, 1/2 tsp salt and 1 Tbsp thyme in a medium bowl, until they blended well.
  2. I put all the chicken nuggets in the bowl and covered them well in the dry ingredients to make sure the coating is even on every nugget.
  3. I cut the sweet potato in thin round slices, to make sure they cooks well in the middle. I sprinkled over all slices salt and the other Tbsp thyme I had left.
  4. I heated 2 Tbsp duck fat in a medium pan on medium heat (6th heat grade on my stove).
  5. I then put half the nuggets in the pan and cooked them for 4-5 minutes on each side, that is a tital of 9-10 minutes on both sides. You can check them out after 4 minutes, they might cook even faster depending on your heat.
  6. After they fried well on both sides, I placed them on a paper towel and continued the same with the next batch of nuggets. I added in another Tbsp duck fat to the pan to make sure they don’t stick to the pan.
  7. After I finished frying all nuggets, I placed the salted and thymed sweet potato slices to the pan, adding another Tbsp duck fat and fried them for 4-5 minutes on each side. Make sure they have space between them and check them from time to time so you can turn them on the other side if they get too crunchy on the sides.
  8. After finishing the first batch of sweet potatoes I repeated the process with the second and third batches, adding in extra duck fat to the pan in each batch.

And I served them all with AIP garlic mayonnaise, that I made like this:

  1. I mashed 8 cloves of garlic and added them to a small mixing bowl with 1/2 tsp himalayan salt and 1 tsp apple cider vinegar. I mixed all three ingredients until very well combined.
  2. I slowly drizzled 1 tsp olive oil and mixed continuously for a couple of minutes until I created an emulsion. I continue to drizzle another tsp olive oil mixing continuously
  3. I then added in one Tbsp filtered water and continued mizing until the mixture became homogeneous. If you like the mayonnaise less concentrated you can add another Tbsp water but remember to mix everything well.

And Voila!

P.S. I dipped the nuggets and the sweet potato chips in the mayo like there was no tomorrow, that’s how delicious the dish was!

Hope you enjoy my AIP dinner inspiration, feel free to ask any questions in the comments section! 🤠

Carrot Cake with Coconut frosting – AIP and Paleo

I’ve been needing something to sweeten me up after all the thyroid running back and fourth in the past months. So I opened my fridge and decided to do a cake out of the first ingredient I see. And that ingredient was carrot!

I did an AIP friendly carrot cake using the below ingredients that turned out very tasty and sweet, just what I needed! I listed the ingredients into two categories – the carrot cake category and the frosting category – both with separate instructions so as to make it easier for you to follow them.

Here's what I used for the cake:
  • 1 cup tigernut flour
  • 1/2 cup arrowroot powder
  • 2/3 cup coconut flour – I used this one from Bob’s Red Mill:
  • 1/2 Tbsp baking soda
  • 1 tsp ground cinnamon
  • 1/2 tsp ground ginger
  • 1/4 tsp Himalayan sea salt
  • 2 Tbsp lemon juice
  • 1/3 cup coconut milk (used full fat)
  • 2 and 1/2 Tbsp raw honey
  • 1/3 cup melted coconut oil – I used this one for Barlean’s which is great for cooking:
Coconut oil
  • 1 cup carrots (shredded)
  • 2 gelatin eggs – Instructions for the “eggs” below
Here's how I did it:
  • I preheated the oven to 180 C or 350 F and lined a baking pan with parchment paper that I greased with coconut oil throughout, including on the edges and in the corners. We wouldn’t want the cake to stick on any side!
  • I mixed the dry ingredients in a larger bowl (tigernut flour, arowroot flour, coconut flour, ginger, cinnamon, salt and baking soda, and in another medium bowl I mixed together the wet ingredients (coconut milk, coconut oil, honey and the lemon juice).
  • I mixed the wet ingredients into the wet ones bit by bit to make sure they combine evenly and then mixed in the carrots.
Time for the gelatin eggs!!
  • I added 4 Tbsp of filtered water to a small sauce pot and sprinkled 2 Tbsp gelatin on top as evenly as possible, to avoid it creating any clumps. I let it bloom for a couple of minutes and them put it on stove on medium heat until all the gelatin was dissolved. When all gelatin dissolved I started whisking vigorously until it created a bit of foam on top. The gelatin eggs are done!
And we're back to the carrot cake recipe now!
  • I added in the gelatin eggs over the cake mixture and stirred everything until it became homogeneous.
  • I then poured the mixture to the baking pan using a spoon and made sure the top is as even as possible. I used another piece of parchment paper to smooth the top even more, and so my pan was ready for baking!
  • I put the pan in the preheated oven and left it for 35 minutes. After 35 minutes I tested it with a toothpick to see if it was completely baked. If the toothpick comes out with cake parts on it you should leave it a couple of minutes more. If the toothpick comes out clean then the cake is done. Try to test again with the toothpick after a couple of minutes and repeat the process if needed.
  • I let it cool completely.
The carrot cake after baking
And here's what I used for the frosting:
  • 1/2 cup coconut butter (you can use home made – just take the upper part that forms in the coconut milk jar, or you can use canned – just take the solid part of the canned coconut milk kept in the fridge. Just remember to only use the solid part from the jar or can, as if you add liquid milk it will not be so frothy.
  • 1 and 1/2 Tbsp honey
And I did it like this: 
  • I put the coconut butter into a smaller bowl and mixed it using a hand mixer, until it became smooth (in its natural form coconut butter is a bit clumpy so we need to smooth it up).
  • I added in the honey gradually, mixing continuously until the frosting became all homogeneous.
  • I left it in the fridge for 30-40 minutes until the cake cooled completely.
  • I then took it out and spread it evenly on the cake before cutting it into pieces.
Paleo carrot cake
The frosted carrot cake cut into pieces

Enjoy!

Coconut Bread Rolls – AIP and Paleo

I missed bread during my AIP diet! Guilty as charged! Just wanted to remember the taste of baked flour in my mouth after almost 2 months of being on a strict AIP diet (in elimination phase).

So I put together some ingredients that gave me these delicious AIP bread rolls I’m very proud of!

Of course they’re gluten-free, egg-free and dairy free and they served me as a great side-dish for my delicious traditional Romanian “bucket meat”.

Here’s what I put in them (measurement unit in grams for flour and ml for liquid):

  • 180 g tapioca flour
  • 40 g coconut flour – I used my favorite from Swanson:
  • 2/3 tsp baking soda
  • 1 tsp ground Himalaya salt
  • 1 tsp garlic powder
  • 2 Tbsp gelatin for making a gelatin egg
  • 80 ml water
  • 1 Tbsp apple cider vinegar
  • 4 Tbsp olive oil, for brushing the rolls
  • 1 Tbsp thyme, for sprinkling over the baked rolls

Here’s how I made my rolls:

  • I first preheated my oven at 200 C or 400 F.
  • I mixed all the dry ingredients in a bowl until well combined (tapioca and coconut flour, garlic powder, salt and baking soda).
Dry ingredients before mixing
  • I then started working on my gelatin egg: I put the water in a small saucepan and sprinkled the gelatin over evenly, making sure it does not create any clumps! I let it sit for 5 minutes and then put the pan on medium heat for one more minute. I then started to stir slowly until I made sure it is all dissolved.
  • Once dissolved, I put the gelatin egg and the apple cider vinegar in the bowl with the dry ingredients and mixed them using a wooden spoon until dough was formed.
  • I let the dough rest for 5 minutes and prepared for creating my rolls by dusting some tapioca flour on my hands to make sure the dough doesn’t stick.
Dough ready for shaping
  • I then divided the dough into eight separate pieces, trying to make them all as equal sized as possible. I then modeled the pieces as rolls and placed them on the baking tray lined with a parchment paper, making sure there’s enough space between them.
  • Before putting them in the oven, I brushed them with olive oil until completely covered and baked them for 12 minutes. I then took them out and brushed them again with olive oil to make sure they turn to a golden color. I put them back in the oven and baked them again for another 12 minutes. Then I took them out and brushed them again with olive oil for the third time and let them bake for another 2-3 minutes or until their crust turned to golden.
  • After the last round of baking I took them out of the oven and sprinkled thyme on all the rolls.

They turned out delicious!

AIP Coffee recipe

One of the hardest foods to eliminate from my diet when I first started the Autoimmune Protocol was coffee. Coffee had been my best friend for 15 years and got to the point where I even drank 2 or 3 coffees a day – black, cappuccino, frappe, espresso – you name it! I drank them all with so much a pleasure that I’d might say I had a real addiction.

Of course I had to give up coffee in the AIP 30 days reset period because it is not on the list of foods allowed so if I’d continued to drink it I wouldn’t have had the certainty that my gut would heal so I didn’t want to take that chance. Luckily, coffee is on the Reintroduction foods list in the AIP diet, so I will reintroduce it at some point. However, until that moment comes, I had to figure something out fast as I was so sad about it…

But lucky me, I did a bit of research a and found a great substitute for coffee in a plant called chicory. I tried to drink soluble chicory at first but its simple flavor didn’t satisfy me as much as coffee did so I had to find another solution. So I tried a combination that looks more like milk coffee, which worked great for me, and which only contains anti-inflammatory ingredients.

Here are the ingredients I use for my AIP coffee:

  • 1/2 cup filtered water
  • 1/2 cup coconut milk (I make my own organic milk – this is how)
  • 1 tbsp chicory powder (ground)
  • 1/3 tsp carob powder (ground)
  • 1/3 tsp ground cinnamon (ground)

Here’s how I go about:

  • I bring the water to a boil in a kettle
  • I then add in the coconut milk and the rest of ingredients: chicory, carob and cinnamon
  • I stir everything well using a tablespoon
  • I let it cool a bit and it’s ready to serve!

The taste is quite satisfying for me, as there’s a light flavor of every ingredient I put in my coffee. I don’t even feel like sweetening it as it already has a mild sweetness from the coconut milk and carob, so it’s a win-win situation 🙂 And most importantly, I drink it with so much pleasure since I know everything I put in it is organic and healthy!

Enjoy your AIP coffee!

Guacamole – AIP and Paleo

Guacamole - AIP and Paleo recipe

Avocado has been my source of inspiration lately. I like its texture, it’s color and especially I like that it’s full of antioxidants and vitamins! It’s quite funny because we don’t grow this fruit in Romania, but I’m so glad I discovered it better since I’ve started my AIP diet.

Avocado is both carbohydrates and healthy fats, which makes it the perfect choice for the AIP and Paleo diets and the whole process of healing your leaky gut. And to make things more interesting, it contains some of the most valuable vitamins, like:

  • Vitamin A
  • Vitamin B6
  • Vitamin C
  • Vitamin E
  • Vitamin K

Now enough with the praise, let’s do some AIP guacamole! 🙂

Here are the ingredients I used for one serving:

  • 1 ripe avocado (the kind of use has a darker color when ripe)
  • 1/2 medium size onion
  • 1 tsp olive oil (the avocado is already oily so more oil makes it a bit icky). I used this olive oil since it’s 100% organic:
  • 1 tsp lemon juice
  • sea salt per taste

Here’s how I prepared it:

  • I cut the avocado in two halves and took out its kernel. I then peeled it using a large spoon (if the fruit is ripe you just bring in the tip of the spoon between the pulp and the peel and you can easily take out the pulp by rotating the spoon)
  • I placed the fruit in a small mixing bowl and mashed it all using a fork. It needs to be completely mashed in order to be able to mix it with the rest of ingredients.
  • I then added in the chopped onion, the olive oil, the lemon juice and the sea salt and blended all ingredients together until I obtained a homogeneous mixture.

Yes, it’s that simple!

I like to eat the guacamole as it is OR as a side dish to Romanian traditional AIP “bucket meat”.

*If you prefer a bruschetta snack you can easily top any type of AIP or Paleo bread with it and you’ll have your super snack ready in no time.

Enjoy!